
Installation
You can start with a coding agent or set up the codebase yourself. Both routes produce the same real project, so you can always inspect, test, and extend what is built.
Start with a coding agent (recommended)
Section titled “Start with a coding agent (recommended)”The easiest way to build with Fluxzero is to open Get started and copy the instruction into your coding agent. The agent will connect to the current Fluxzero guidance and can create, run, and evolve the application with you.
You stay focused on what the product should do. The agent works in the codebase, while Fluxzero supplies the backend foundation it should not have to recreate.
Set up the codebase yourself
Section titled “Set up the codebase yourself”If you prefer to work directly in the code, use the Fluxzero CLI or project generator. The CLI is the recommended manual route; the generator creates a ready-to-go project without installing the CLI first.
Use our project generator
Section titled “Use our project generator”If you prefer not to install the CLI, you can generate a project using the form below. This will create a zip file with a ready-to-go Fluxzero project that you can download and run locally.
Fluxzero Project Generator
Bootstrap your new Fluxzero project
Using the Fluxzero CLI
Section titled “Using the Fluxzero CLI”The Fluxzero CLI is the most convenient way to scaffold, build, and run Fluxzero applications. The CLI itself is a native executable and does not require Java. Generated Fluxzero projects require Java 21 or newer.
-
Get the Fluxzero CLI
Install with Homebrew:
Terminal window brew install fluxzero-io/tap/fluxzeroHomebrew installs both the
fzcommand and itsfluxzeroalias. Upgrade later releases with:Terminal window brew updatebrew upgrade fluxzeroInstall with WinGet from PowerShell or Windows Terminal:
Terminal window winget install --exact --id Fluxzero.FluxzeroCLIUpgrade later releases with:
Terminal window winget upgrade --exact --id Fluxzero.FluxzeroCLIIf WinGet is unavailable, use the automated installer instead:
Terminal window iwr -useb https://github.com/fluxzero-io/fluxzero-cli/releases/latest/download/install.ps1 | iexRun the automated installer:
Terminal window curl -sSL https://github.com/fluxzero-io/fluxzero-cli/releases/latest/download/install.sh | shThe installer downloads the native executable to
~/.fluxzero/binand helps make thefzandfluxzerocommands available on yourPATH.Native executables for macOS, Windows and Linux are available on the latest release page.
Alternatively, download fluxzero-cli.jar and run it with Java 21 or newer:
Terminal window java -jar fluxzero-cli.jarVerify the installation:
Terminal window fz version -
Generate a new project
Terminal window fz initThis command will prompt you for a few questions to set up your project:
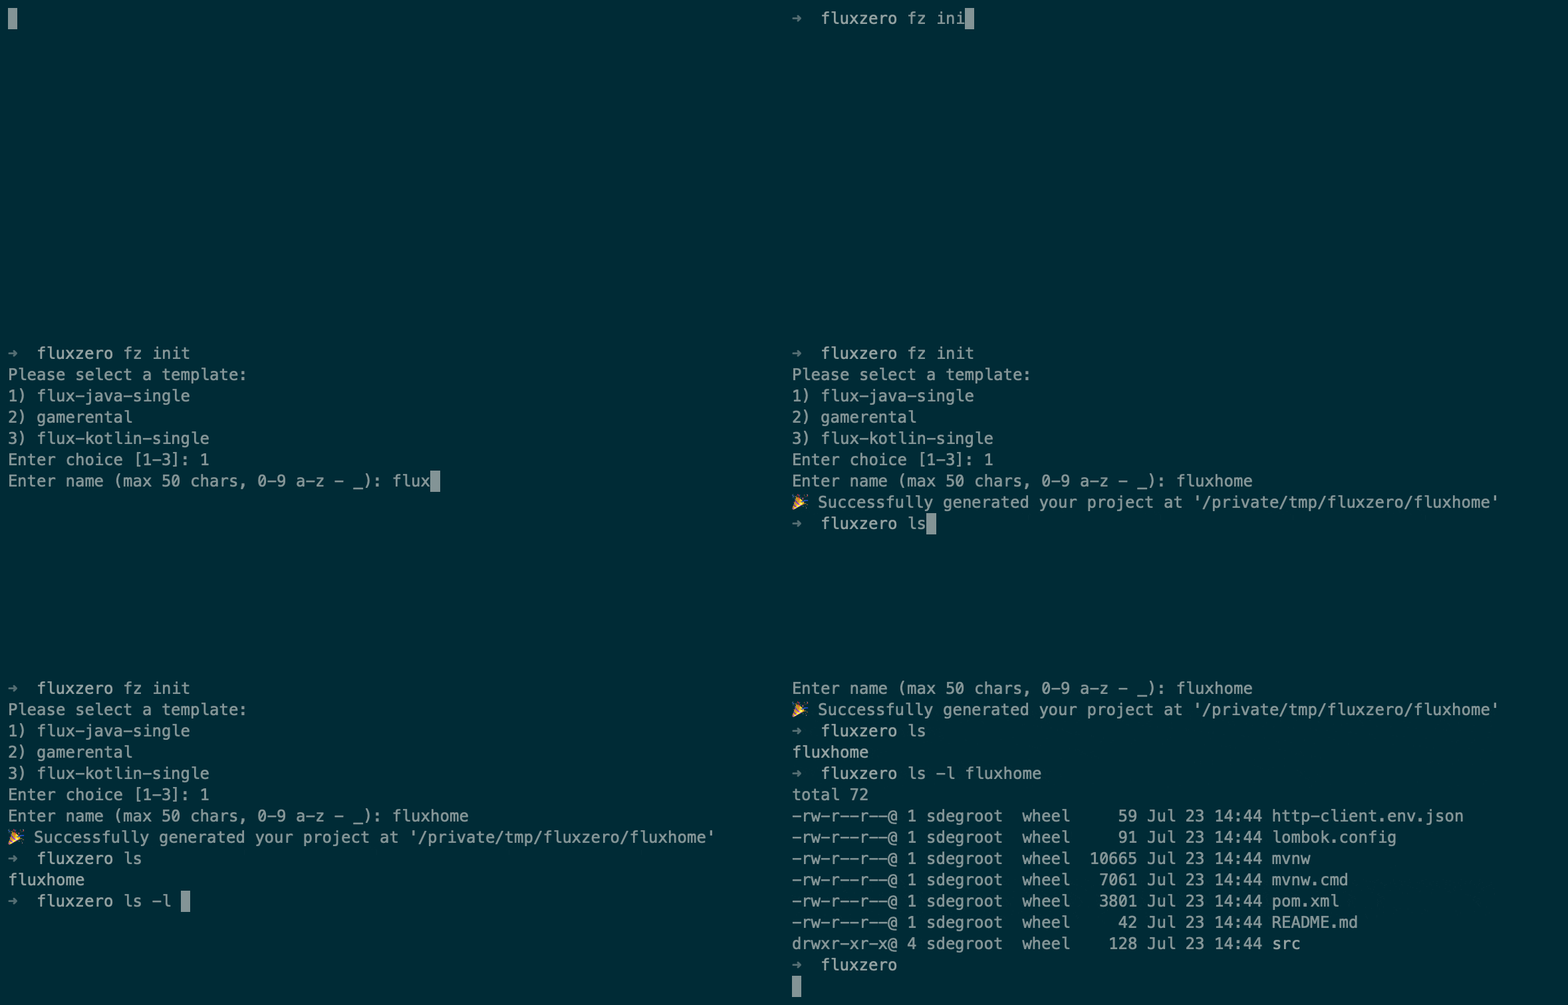
You can also pass options directly, for example:
Terminal window fz init --name my-projectThe CLI will ask you which template you want to use. See
fz --helpfor more options. -
Build your project
Terminal window cd my-project./gradlew build
Manually
Section titled “Manually”Add Fluxzero Packages to your pom.xml, inside <project>. Merge these entries
with any existing repository sections. Dependencies and Maven build plugins
use separate repository lists:
<repositories> <repository> <id>fluxzero</id> <url>https://packages.fluxzero.io/maven</url> <snapshots><enabled>false</enabled></snapshots> </repository></repositories><pluginRepositories> <pluginRepository> <id>fluxzero-plugins</id> <url>https://packages.fluxzero.io/maven</url> <snapshots><enabled>false</enabled></snapshots> </pluginRepository></pluginRepositories>Downloads are public and require no account or credentials. Existing artifacts remain on Maven Central; from 1 October 2026, new Fluxzero releases will be published only at Fluxzero Packages.
Import the Fluxzero BOM in your
dependencyManagement section to centralize version management. Set
fluxzero.version to the release you want from the BOM directory:
<dependencyManagement> <dependencies> <dependency> <groupId>io.fluxzero</groupId> <artifactId>fluxzero-bom</artifactId> <version>${fluxzero.version}</version> <type>pom</type> <scope>import</scope> </dependency> </dependencies></dependencyManagement>Then declare only the dependencies you actually need (no version required):
<dependencies> <dependency> <groupId>io.fluxzero</groupId> <artifactId>sdk</artifactId> </dependency> <dependency> <groupId>io.fluxzero</groupId> <artifactId>sdk</artifactId> <classifier>tests</classifier> <scope>test</scope> </dependency> <dependency> <groupId>io.fluxzero</groupId> <artifactId>test-server</artifactId> <scope>test</scope> </dependency> <dependency> <groupId>io.fluxzero</groupId> <artifactId>proxy</artifactId> <scope>test</scope> </dependency></dependencies>Annotation processing
Section titled “Annotation processing”For Java versions above 21, you must explicitly register the Fluxzero SDK as an annotation processor. This ensures that all of Fluxzero’s annotations are properly detected during compilation.
Add the Fluxzero SDK to the annotationProcessorPaths of your maven-compiler-plugin:
<plugin> <groupId>org.apache.maven.plugins</groupId> <artifactId>maven-compiler-plugin</artifactId> <configuration> <parameters>true</parameters> <annotationProcessorPaths> <path> <groupId>io.fluxzero</groupId> <artifactId>sdk</artifactId> </path> </annotationProcessorPaths> </configuration></plugin>Gradle
Section titled “Gradle”Add the Packages repository before Maven Central in build.gradle.kts or
build.gradle. Maven Central remains available for other libraries. If your
build centralizes repositories in settings.gradle(.kts), put these entries in
dependencyResolutionManagement.repositories instead.
For Fluxzero Gradle plugins used through plugins {}, also add Packages in
pluginManagement.repositories in settings.gradle.kts, before the Plugin Portal:
pluginManagement { repositories { maven { url = uri("https://packages.fluxzero.io/maven") } gradlePluginPortal() }}Keep pluginManagement at the start of the settings file. It is only needed for
Gradle plugin resolution, not for using the SDK as a dependency. The same
repository declarations work in Groovy settings with single-quoted strings.
Use platform BOM support to align dependency versions automatically:
Kotlin DSL (build.gradle.kts)
repositories {    maven { url = uri("https://packages.fluxzero.io/maven") }    mavenCentral()}
dependencies {    implementation(platform("io.fluxzero:fluxzero-bom:${fluxzeroVersion}"))    implementation("io.fluxzero:sdk")    testImplementation("io.fluxzero:sdk") {        artifact { classifier = "tests" }    }    testImplementation("io.fluxzero:test-server")    testImplementation("io.fluxzero:proxy")    annotationProcessor("io.fluxzero:sdk")}
Groovy DSL (build.gradle)
repositories {    maven { url = uri('https://packages.fluxzero.io/maven') }    mavenCentral()}
dependencies { implementation platform("io.fluxzero:fluxzero-bom:${fluxzeroVersion}") implementation 'io.fluxzero:sdk' testImplementation('io.fluxzero:sdk') { artifact { classifier = 'tests' } } testImplementation 'io.fluxzero:test-server' testImplementation 'io.fluxzero:proxy' annotationProcessor 'io.fluxzero:sdk'}© 2026 Fluxzero